
Setting up your AI agent in HighEngage involves creating it, adding knowledge, and testing how it responds.
By the end of this setup, your agent will be ready to handle real conversations.
Step 1: Create a New Agent #
- Go to the Dashboard
- Click Create Agent
- Enter a name for your agent
- Upload your data source
- Click Create
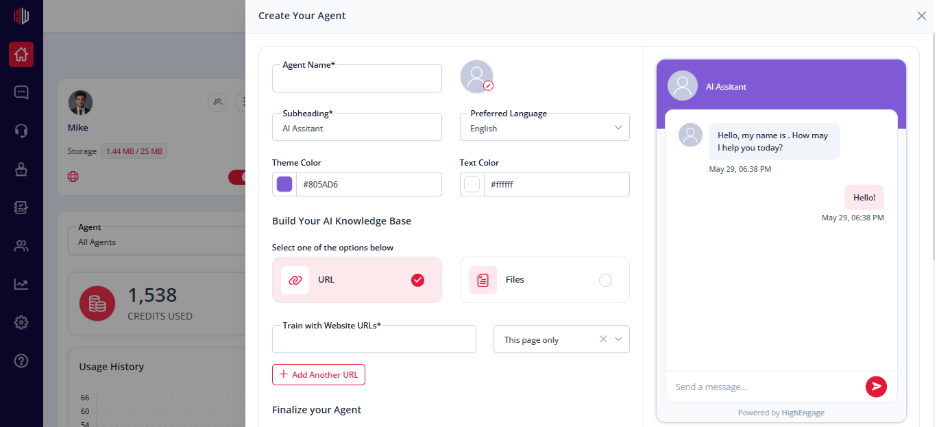
You’ll be redirected to the Agent Settings page.
Step 2: Configure Basic Settings #
- In Personalization tab Set up your agent’s identity and appearance
- Add Agent Name, Subheading, and Description
- Customize theme, colors, and avatar
- Set chat input placeholder
- Configure language and chat behavior
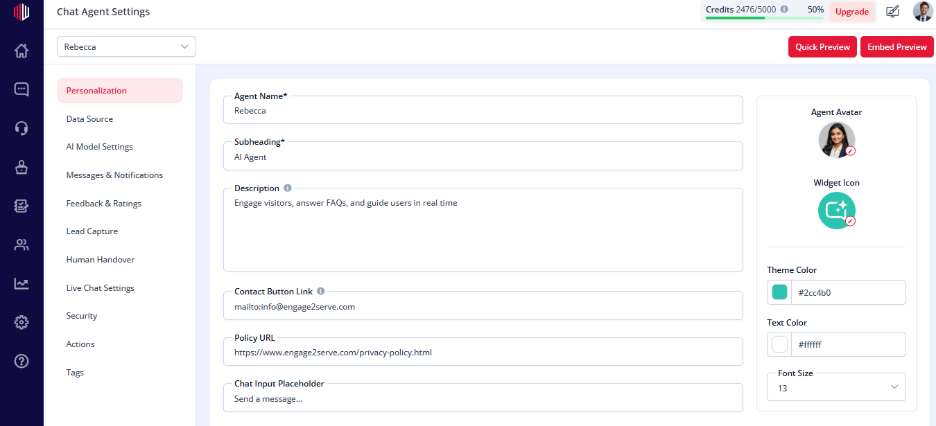
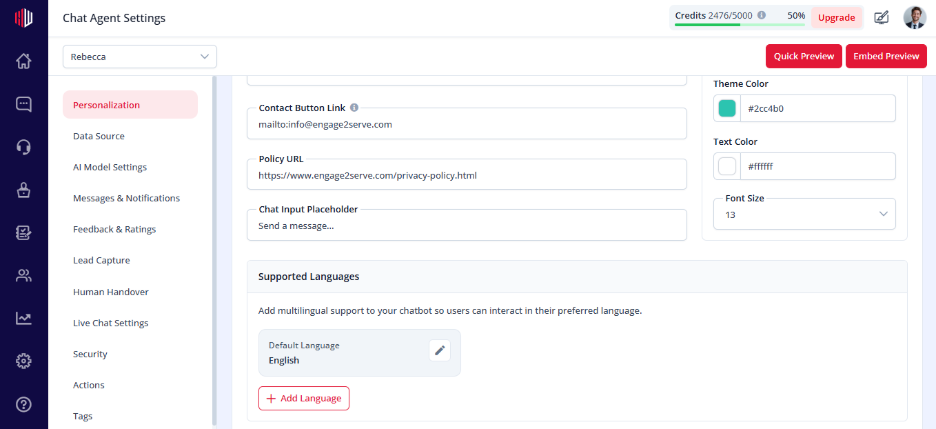
This defines how your chatbot looks and interacts with users.
Step 3: Add Data Sources #
Your agent needs knowledge to answer questions.
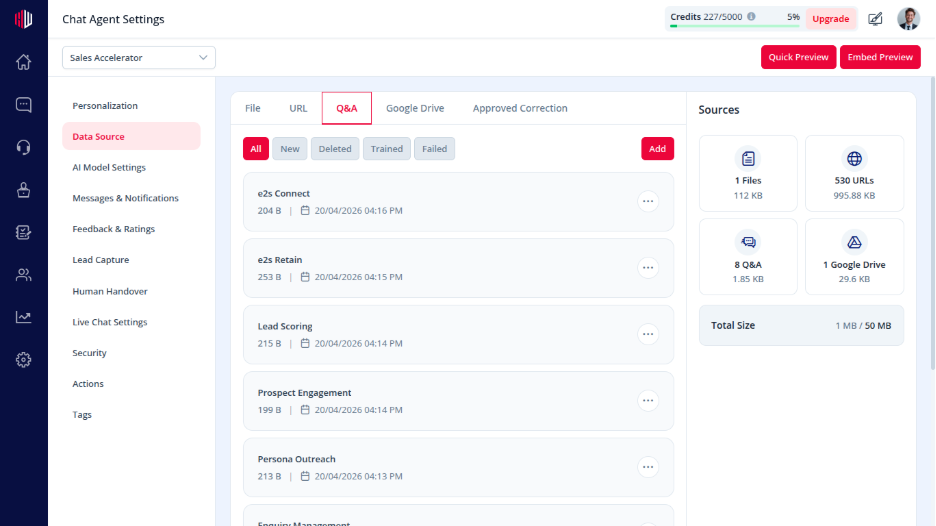
- Go to Data Source
- Add content using:
a. Files (PDF, DOC, etc.)
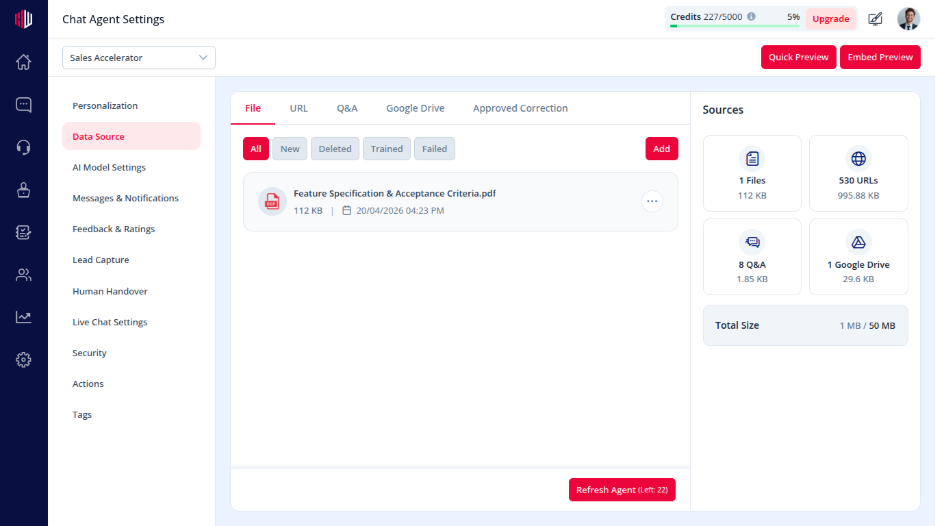
b. Website URLs
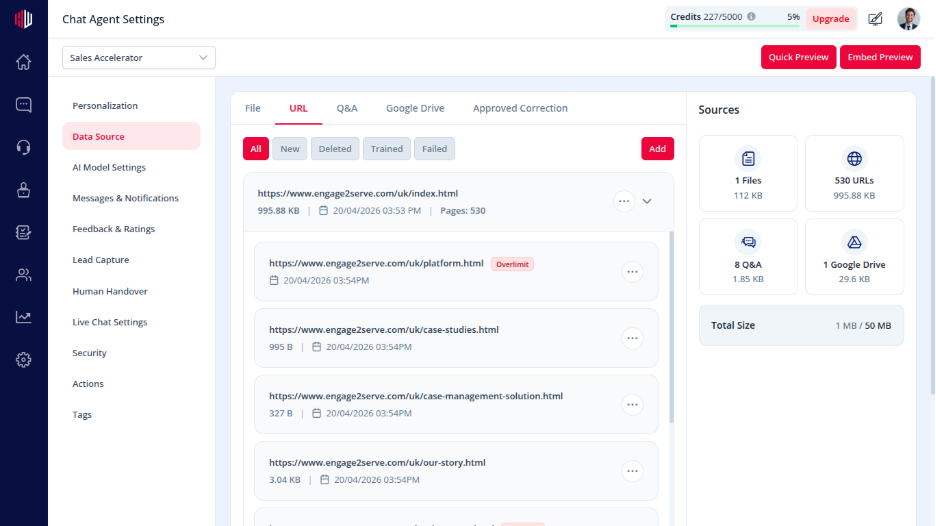
c. Q&A entries
- Click Refresh Agent
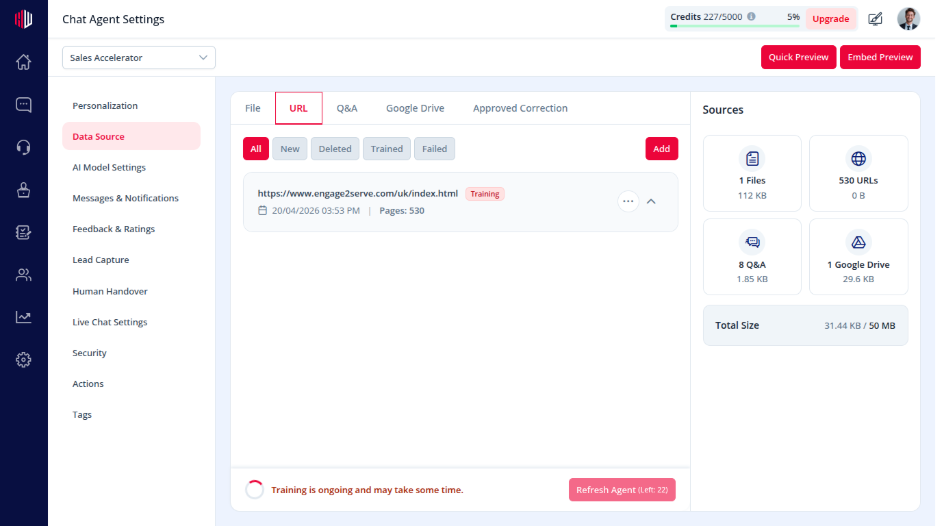
Only trained data is used for responses.
Step 4: Test Your Agent #
Before going live, test how your agent responds:
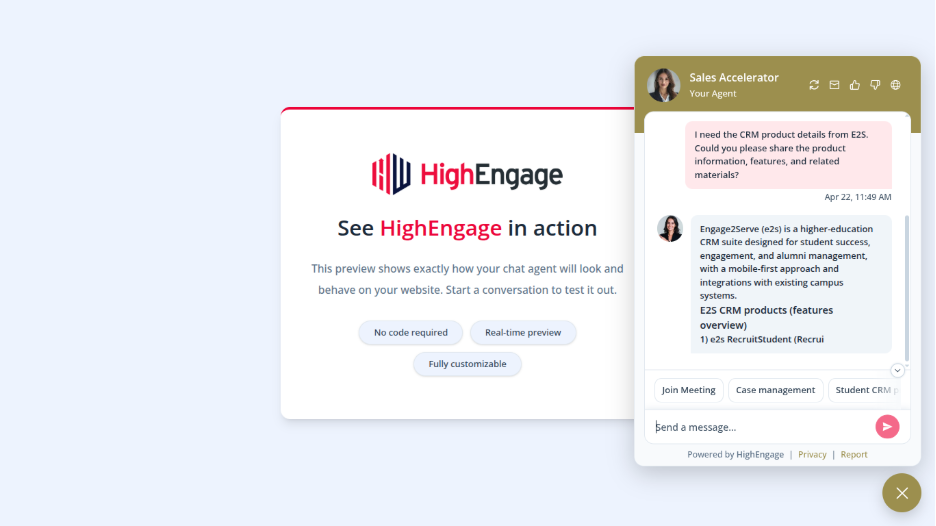
- Use the Preview panel
- Ask real user questions
- Check accuracy and completeness
- Identify gaps in responses
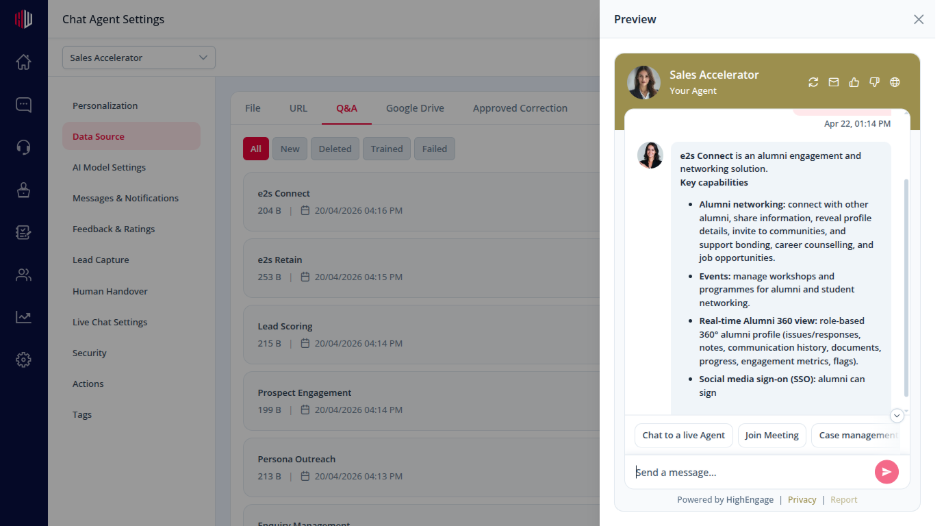
If needed, update your data and refresh the agent again.
When Is Your Setup Complete? #
Your AI agent is ready when:
- It has trained data
- It can answer questions correctly
- Basic settings are configured
At this point, your agent is ready to be used and further optimized.
What to Do Next #
Now that your agent is set up:
- Improve responses using Corrections
- Add Workflows to automate actions
- Enable Lead Capture or Live Chat
If you have any questions, concerns, or need further clarification, please contact support@highengage.com for assistance.


