
This guide shows you how to add your HighEngage chatbot to your WordPress website.
By the end, your chatbot will be live and ready to interact with visitors.
Method 1: Add via Theme (Recommended) #
This method adds the chatbot across your entire website.
Steps
- Go to your Agent Dashboard
- Click Embed Preview
- Copy the script code
- Login to your WordPress Admin
- Go to:
Appearance → Theme File Editor
- Open the footer.php file
- Paste the script just before </body>
- Click Update File
- Refresh your website
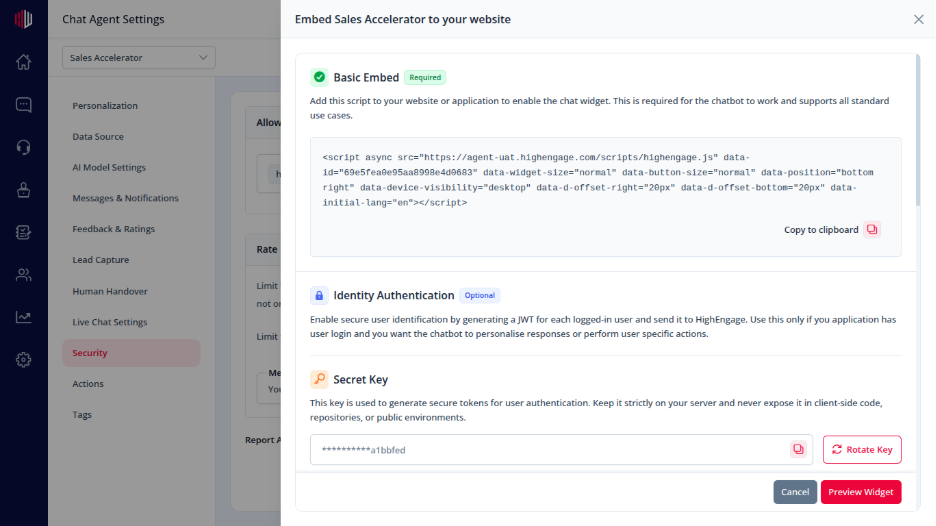
Your chatbot should now appear.
Method 2: Use a Plugin (No Code) #
Use this if you don’t want to edit theme files.
Steps
- Go to Plugins → Add New
- Install a plugin like Insert Headers and Footers
- Open the plugin settings
- Paste the script in the Footer section
- Save changes
Important Notes #
- Make sure your agent is enabled
- Add your website in Security → Allowed Domains
- Clear cache if the chatbot doesn’t appear
- Works with all WordPress themes
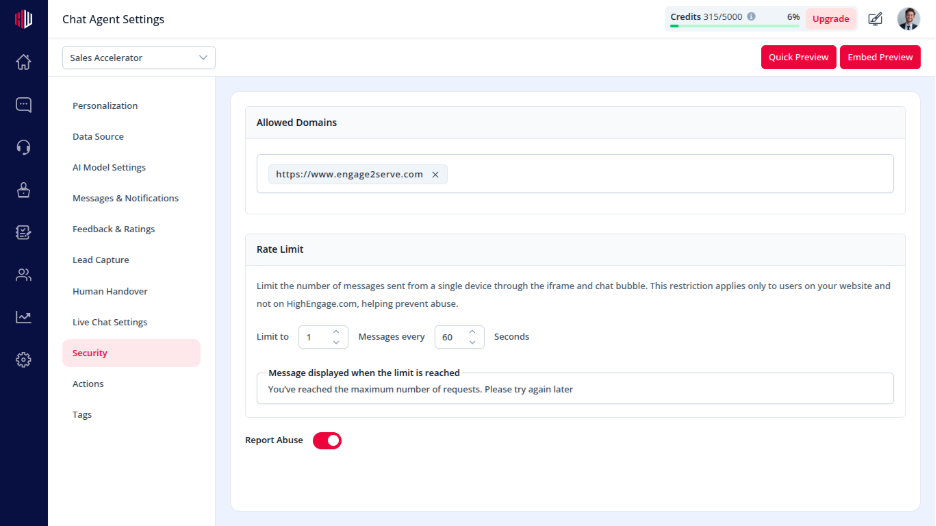
Next, open your website and confirm the chatbot loads correctly.
If you have any questions, concerns, or need further clarification, please contact support@highengage.com for assistance.


