Skip to content
HighEngage

Getting started

8
  • Navigating the HighEngage Interface
  • Overview of the HighEngage Dashboard 
  • Logging in to HighEngage
  • Understanding the 7-Day Free Trial in HighEngage 
  • Creating Your HighEngage Account
  • How HighEngage AI Agents Work 
  • Signing Up with Google vs Email
  • What is HighEngage? 

Onboarding & Setup

12
  • Sharing Agents With Your Team 
  • Collaboration 
  • Installing HighEngage on WordPress 
  • Embedding the AI Chat Widget 
  • Deployment & Installation 
  • Previewing Your AI Agent 
  • Understanding Agent Status (Active vs Disabled) 
  • Editing an Existing Agent 
  • Agent Management 
  • Setting Up Your New AI Agent 
  • Completing the HighEngage Onboarding Wizard 
  • Choosing Your Use Case Template 

Personalizing Your AI Chatbot

10
  • Opening Chat by Default 
  • Adding Privacy Policy Links 
  • Adding Contact Page Links 
  • Customizing Chat Input Placeholder Text 
  • Configuring Supported Languages 
  • Setting Chat Font Size 
  • Changing Chat Theme Colours 
  • Choosing Widget Icons 
  • Setting the Chat Widget Avatar 
  • Customizing Your Agent Name and Description 

Training Your AI Agent (Knowledge Base)

10
  • Fixing AI Answers When Data Is Incorrect 
  • How the “Refresh Agent” Training Process Works 
  • Understanding Data States: New, Trained, Removed 
  • Using Google Drive as a Data Source 
  • Creating Custom Q&A for Your Agent 
  • Re-Crawling Website Data 
  • Crawling an Entire Website vs Single Page 
  • Training Your Agent with Website URLs 
  • Adding Files to Train Your AI Agent 
  • How AI Knowledge Training Works in HighEngage 

Configuring AI Behavior

4
  • Writing Effective System Prompts 
  • Setting the AI Agent Role 
  • Understanding AI Model Performance vs Cost 
  • Configuring AI Behavior 

Chat Messages & Interaction Settings

12
  • Configuring Message-Level Avatar 
  • Automatically Restarting Chats After Inactivity 
  • Allowing Users to Restart Chats 
  • Setting Message Character Limits 
  • Changing Prompt Display Position 
  • Adding Custom Links to Chat 
  • Making Example Questions Disappear After First Message 
  • Adding Example Questions to Guide Users 
  • Changing Time Format in Chat 
  • Enabling Automatic Greetings 
  • Customizing the “No Data Found” Response 
  • Setting the Intro Message 

Lead Capture & Visitor Data

7
  • Viewing Captured Leads 
  • Customizing the Lead Thank-You Message 
  • Making Lead Fields Mandatory 
  • Creating Custom Lead Fields 
  • Collecting Name, Email, and Phone 
  • When Lead Capture Is Triggered 
  • How Lead Capture Works in HighEngage 

Human Handover & Escalation

6
  • Receiving Escalation Emails 
  • Customizing Escalation Messages 
  • Escalating After Message Threshold 
  • Escalating After Multiple Failed AI Responses 
  • Allowing Users to Request Human Assistance 
  • Enabling Human Support Escalation 

Feedback & Chat Ratings

7
  • Viewing Feedback Analytics 
  • Collecting Feedback from Idle Chats 
  • Triggering Post-Chat Surveys 
  • Configuring Negative Feedback Responses 
  • Customizing Survey Questions 
  • Collecting Conversation Ratings 
  • Enabling Message-Level Feedback 

Security & Safety

4
  • Customizing Rate Limit Messages 
  • Setting Chat Request Rate Limits 
  • Enabling Abuse Reporting 
  • Restricting Chatbot in Allowed Domains 

Troubleshooting & Best Practices

7
  • Chat Widget Not Loading on My Website 
  • Human Escalation Not Working 
  • Lead Capture Not Triggering 
  • Refresh Agent Not Updating Responses 
  • My Website Crawl didn’t Work 
  • AI Is Giving Incorrect Answers 
  • Why My AI Agent Is Not Answering Questions 

Deployment

3
  • Installing HighEngage on Your Web Application 
  • Installing HighEngage on WordPress 
  • Embedding the Chat Widget 

Account & Billing

2
  • Understanding Free Trial Limits 
  • Managing Your Subscription 

Integrations

6
  • Zoho Sprints Integration
  • Pipedrive Integration
  • Google Drive Integration
  • Calendly Integration
  • HubSpot Integration
  • Integrations
View Categories
  • Home
  • help
  • Integrations
  • Google Drive Integration

Google Drive Integration

1 min read

The Google Drive integration enables you to connect your Google Drive account with HighEngage, allowing your AI agent to use documents stored in Google Drive as a knowledge base. Once connected, HighEngage can securely access your selected Drive content, making it easier to train your chatbot with up-to-date information.

Before You Begin #

Ensure you have:

  • An active HighEngage account.
  • A Google account with access to Google Drive.

Connecting Google Drive to HighEngage #

  1. Log in to your HighEngage account.
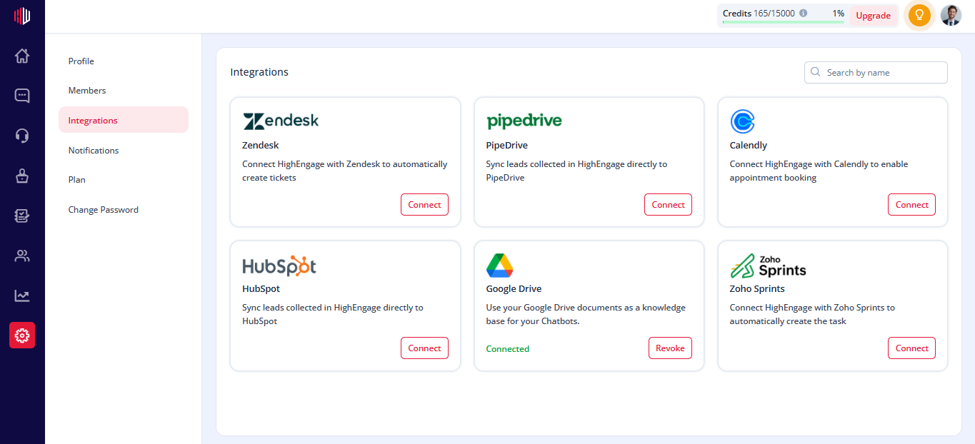
  2. Navigate to Settings → Integrations.
  3. Locate Google Drive and click Connect.
  1. You will be redirected to the Google Sign-In page.
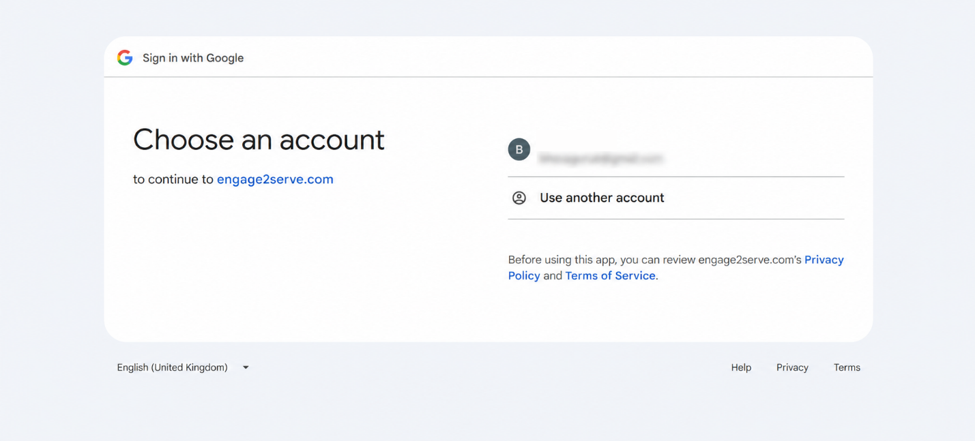
  1. Select the Google account you want to connect.
  2. Review the permissions requested by HighEngage.
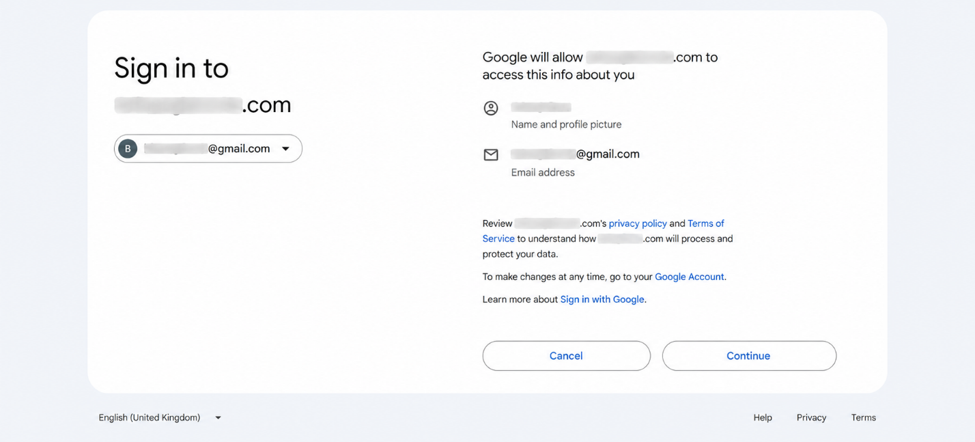
  1. Grant the requested Google Drive permissions by selecting the checkbox and clicking Continue.
  2. After authorization is completed, you will be redirected back to HighEngage.
  3. The integration status will change to Connected, confirming that your Google Drive account has been linked successfully.
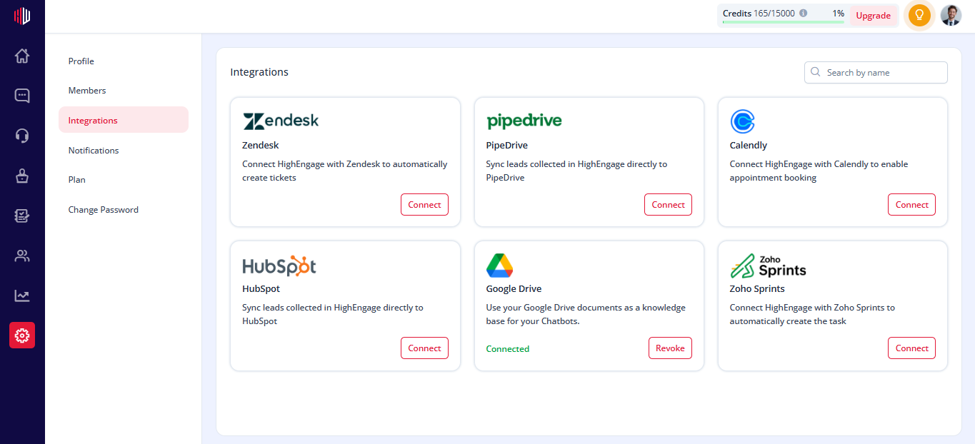
Now, Your google drive is now successfully connected.

How It Works #

  1. Navigate to Chat Agent Settings and select the agent you want to configure.
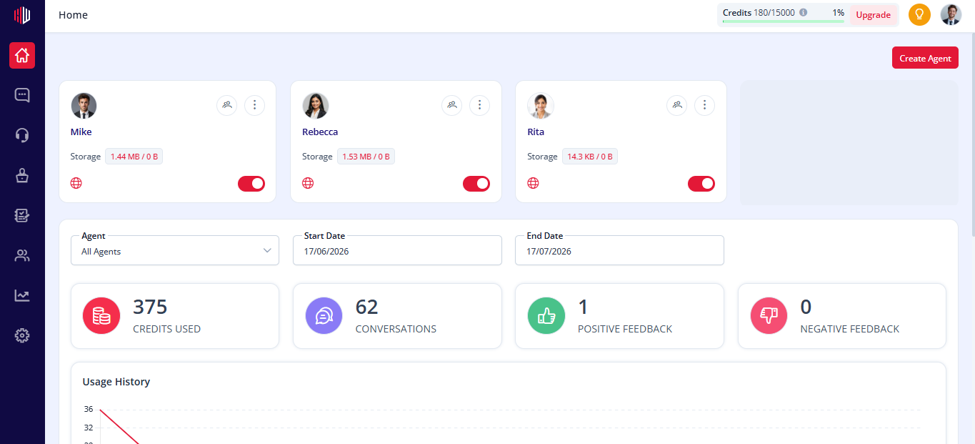
  1. Open Data Source from the left navigation panel.
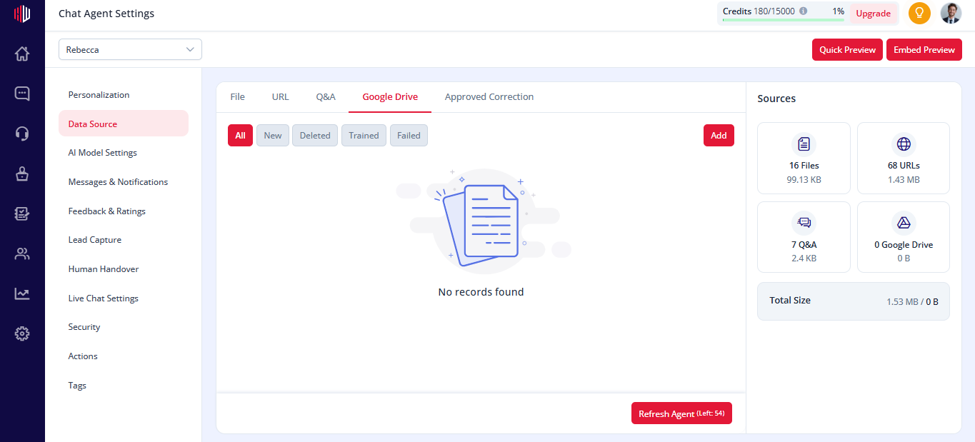
  1. Select the Google Drive tab.
  2. Click Add.
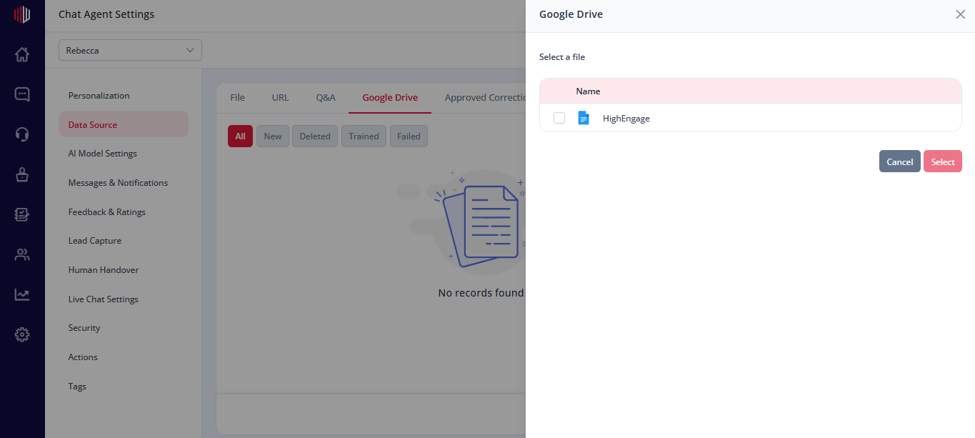
  1. A list of available Google Drive files will appear.
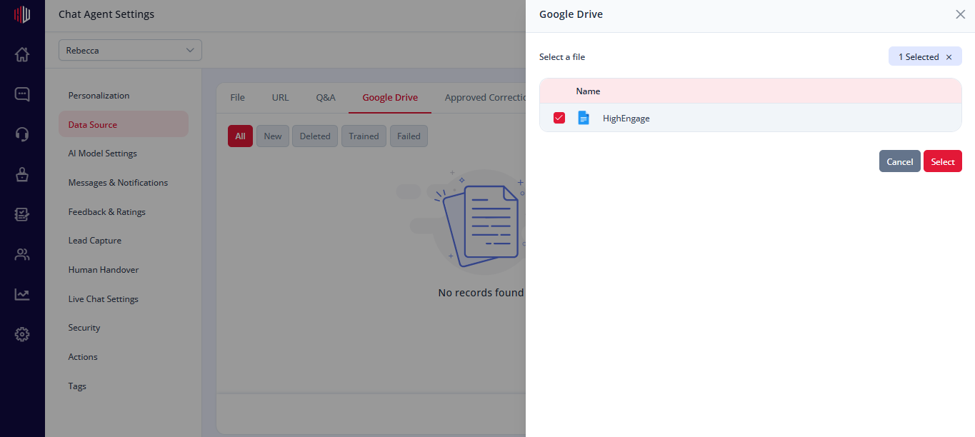
  2. Select the file(s) you want to import.
  3. Click Select.
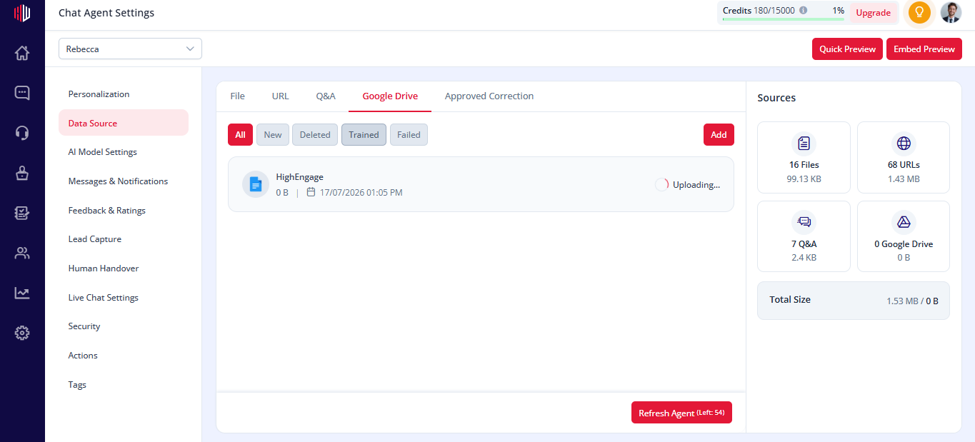
  1. HighEngage imports the selected files and begins processing them.
  2. Once the upload is complete, click Refresh Agent to retrain your AI agent using the newly imported content.
Verifying the Connection #

Once connected:

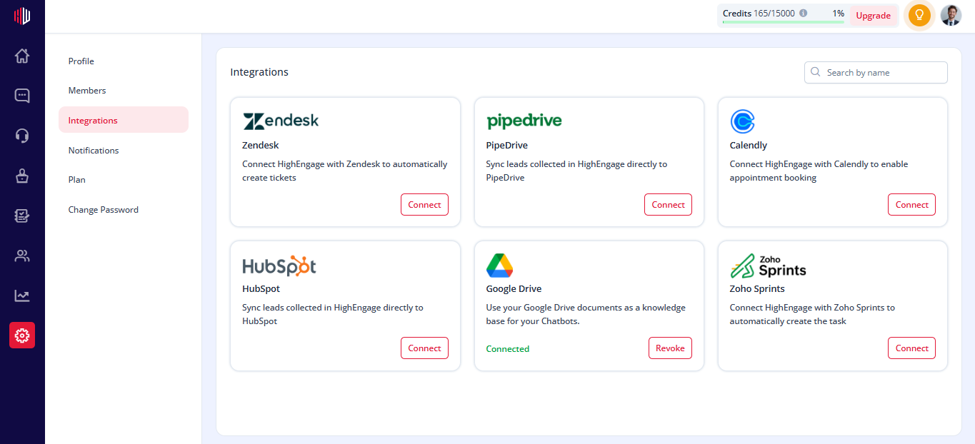
  • The Google Drive card in Settings → Integrations will display Connected.
  • The Connect button will change to Revoke.
  • Your Google Drive account is now available for importing documents into your chatbot’s knowledge base.

Revoking the Integration #

If you no longer wish to use Google Drive with HighEngage:

  1. Navigate to Settings → Integrations.
  2. Locate the Google Drive integration.
  3. Click Revoke.

Once revoked:

  • HighEngage will no longer have access to your Google Drive account.
  • Previously imported documents will remain available unless removed manually, but new synchronization and imports will no longer be possible until the integration is reconnected.

Troubleshooting #

  1. Unable to connect
  • Ensure you are signing in with the correct Google account.
  • Verify that pop-ups are not blocked by your browser.
  • Try reconnecting after refreshing the page.

2. Authorization failed

  • Check your internet connection.
  • Ensure all requested permissions were granted.
  • Disconnect and reconnect the integration if necessary.

3. Connection lost

If your Google authorization expires or access is revoked:

  • Return to Settings → Integrations.
  • Click Connect to authorize Google Drive again.

Benefits #

  • Import knowledge directly from Google Drive.
  • Train your AI agent using existing documents.
  • Keep your knowledge base centralized and easy to manage.
  • Reduce manual uploads by connecting your Drive account.
  • Quickly update chatbot responses by syncing the latest documents.

If you have any questions, concerns, or need further clarification, please contact support@highengage.com for assistance.

What are your Feelings

  • Happy
  • Normal
  • Sad

Share This Article :

  • Facebook
  • X
  • LinkedIn
  • Pinterest
Table of Contents
  • Before You Begin
  • Connecting Google Drive to HighEngage
  • How It Works
  • Verifying the Connection
  • Revoking the Integration
  • Troubleshooting
  • Benefits
HighEngage

All rights reserved